How to Ride Amtrak in 9 Easy Steps + Helpful Things to Know Before Riding

🔗 This post contains affiliate links, meaning I may earn a small commission if you purchase anything mentioned, at no extra cost. Thank you! See my Terms & Conditions for more info.
Ever thought about taking the train to your destination?
Nowadays, we’re so quick to book a flight for our trips and vacations. And it makes sense to an extent — it’s usually faster and more normalized. But sometimes you don’t feel like dealing with the chaos the airport usually brings.
Sometimes you just want to sit back, enjoy the ride and not worry about getting to the airport two hours before departure.
Thankfully, there’s an alternative: riding Amtrak! If you’ve ever thought about riding Amtrak, but didn’t follow through, this post is for you. As someone who’s ridden Amtrak six times, I’m going to break down exactly what to expect on your first US train travel experience, from start to finish (along with some helpful planning tips).
THIS COMPREHENSIVE TRAVEL GUIDE IS ALL ABOUT HOW TO RIDE AMTRAK.
FIRST, WHAT THE HECK IS AMTRAK?
Amtrak is the national passenger railroad company of the United States, serving over 30 million passengers per year.
It operates intercity rail service in every contiguous US state besides Wyoming and South Dakota, as well as in three Canadian provinces: Ontario, Quebec, and British Columbia.
HOW TO RIDE AMTRAK
STEP 1: HEAD TO AMTRAK’S WEBSITE OR MOBILE APP
The first step to riding Amtrak for the first time is to visit their website or mobile app.
Either will work just fine, but I prefer the app since it’s a bit more user-friendly. A common complaint when booking an Amtrak ride is that their booking process can be a bit difficult, and I find that using the mobile app is a much smoother experience.
STEP 2: ENTER YOUR ORIGIN & DESTINATION TRAIN STATIONS
Next, you’ll want to enter your origin and destination train stations. These are the stations you’ll be departing from and arriving to.
Just like airports, there’s always at least one major station in every state (besides Wyoming and South Dakota, as aforementioned).
Though I live in Illinois, I travel about 30 minutes north to St. Louis and take the Amtrak from the Gateway Station since it’s the closest + most logical option for me.
I’ve only ridden to Chicago’s Union Station so far, but there are tons of other destinations — especially in the Midwest.
STEP 3: BROWSE YOUR OPTIONS
After you enter your train stations, you’ll be brought to a screen that displays all of your train options.
This will include schedules, routes and pricing. Most routes will offer coach and business class fares. If you’re riding Acela — which is available in the East Coast — you’ll be riding first class.
Be sure to browse through all of your options.
You’ll find that leaving earlier (around 5 or 6 in the morning) is often cheaper than departing a bit later in the day at a more favorable time. Every time I’ve visited Chicago so far, we’ve departed Gateway Station no later than noon.
It’s funny because even though the ride is five hours, I still have energy to wander through the city when I arrive. This definitely isn’t the case when I travel by plane — when I do that, I need the remainder of the day to catch up on the sleep I lost.
STEP 4: PURCHASE YOUR TRAIN TICKET
Once you know when & where you want to go and how to get there, it’s officially time to purchase your train ticket.
This step is fairly simple.
Add your train ticket to your cart, choose your seats (if applicable), fill in some basic information including your name and email, and buy your ticket. Once your order is successfully placed, you’ll receive a confirmation email.
I suggest adding your ticket to your mobile wallet — like Apple Pay, Google Pay, or Samsung Pay — for quick, easy access when you board the train on departure day.
You should be able to do this as soon as you buy your train ticket.
STEP 5: ARRIVE AT YOUR LOCAL TRAIN STATION & HEAD TO THE WAITING AREA
On departure day, you’ll want to arrive at your local Amtrak station about 30 minutes to one hour before departure.
Remember that you don’t have to go through security and boarding is quick, so there’s no need to show up two hours in advance. (I mean, you can, but you’ll need to keep yourself busy while you wait.)
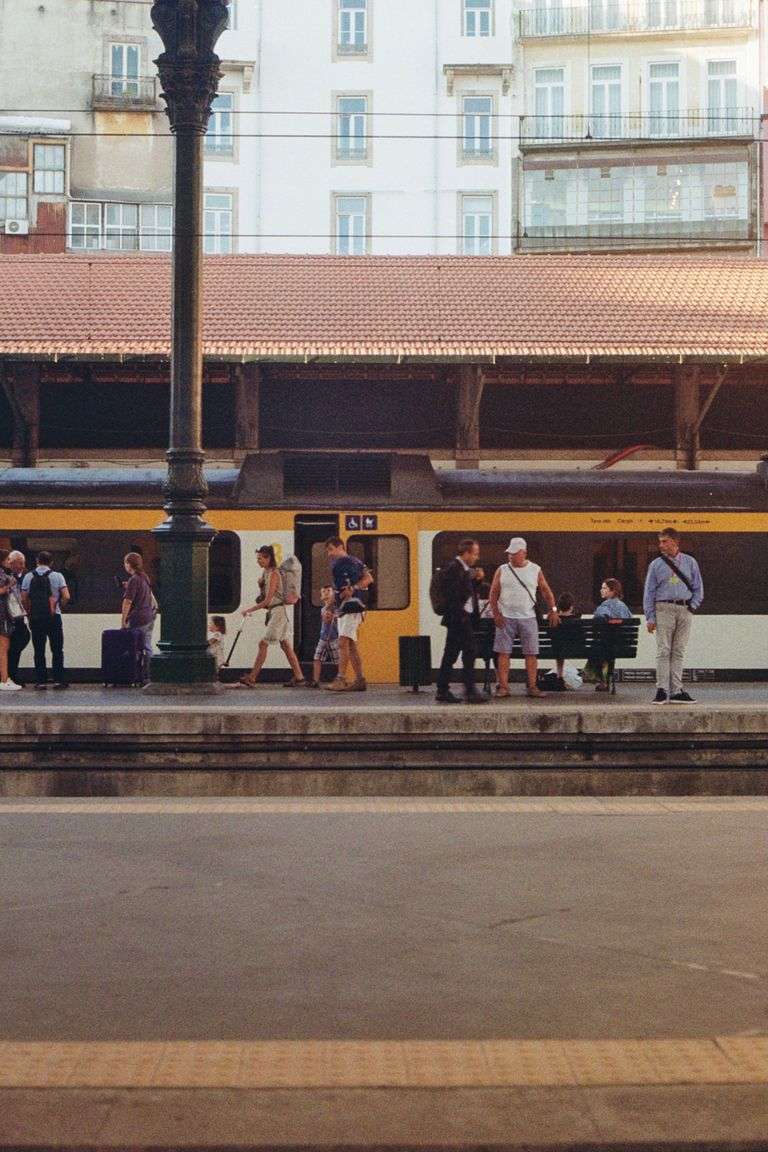
Once you’re there, head to the waiting area (not to be confused with the boarding area). At practically every Amtrak station, this area is visible immediately when you enter. Simply look for a place to sit while you wait for your boarding announcement to be made.
Like I said earlier, this announcement likely won’t be made until about 15-30 minutes before departure.
As an anxious solo traveler, I absolutely HATE this but there really isn’t much I can do besides to scan the departure screens and check my phone every few minutes.
As you get more experience riding Amtrak, you’ll probably notice that certain routes usually depart from the same boarding areas. But if it’s your first time, you can’t rely on that.
STEP 6: BOARD THE TRAIN
It’s time to board the train!
You’re one step closer to your destination. If you want to score a good seat — especially if your station isn’t the origin destination — you’ll want to board ASAP.
As you’re preparing to board, some train assistants will tell you exactly which car you’ll be in. This will depend on what class you booked: coach, business, or first.
If you’re in business or first class, your exact car number should be listed on your train ticket as well.
Once you’re on the train, look for an empty seat (if you’re riding coach) or navigate to your assigned seat.
If you’re bringing any luggage, be sure to place it in its designated spot — either on the luggage rack near the door or above your seat in the overhead area. Just like on a plane, your personal item will go beneath the seat in front of you.
There’s a good amount of legroom (especially in business and first class), so you shouldn’t have any issues.
After you get yourself all situated, go ahead and pull up your train ticket to have ready for the conductor to scan. If you added it to your mobile wallet, simply use that.
If not, though, don’t worry — you can also access your ticket via email, the Amtrak website, the mobile app, or even bring a printed copy.
STEP 7: ALLOW THE CONDUCTOR TO SCAN YOUR TRAIN TICKET
As you’re leaving the train station, the conductor will begin to go around and scan everyone’s tickets. It’s a fairly quick process as long as everyone is prepared (I know YOU are because we discussed that in the last step!).
Once the conductor reaches you, show them your train ticket.
Make sure your phone is at peak brightness so there are no issues scanning it. The conductor will give you a quick “OK,” signaling you’re all good. From this point, you can sit back and relax.
STEP 8: ENJOY THE RIDE
You’ve done all the hard work. Now it’s time to enjoy the ride! Feel free to do whatever you want — read, journal, watch a movie, check out the cafe car, or even sleep.
If you’re traveling alone and are disembarking the train before the final stop on the route, it’s smart to set an alarm for when you arrive. That way, you don’t miss your stop from napping or blasting music in your ears.
There will be numerous stops along the way, with most being relatively short. Only the major stops with major stations will be a bit longer. You’re really only stopping to allow passengers to get on and off the train, so you won’t have much time to step off and get some fresh air.
These stops will be announced by the conductor. You can also track the ride on the mobile Amtrak app.
RELATED GUIDE: 20+ Things to Do on the Plane or Train
STEP 9: DE-TRAIN & NAVIGATE TO YOUR FINAL DESTINATION
Last but not least, you need to get off the train and navigate to your final destination.
What I love about Amtrak is that it gets you a lot closer to the city center than a plane would. Most of the time, you can simply walk, Uber, or take public transportation to your destination since Amtrak stations are fairly central.
WHY SHOULD YOU RIDE AMTRAK?
It actually depends and there’s no one-size-fits-all answer. Because in some cases, it’s cheaper, quicker, environmentally better and generally more efficient to ride Amtrak instead of flying or driving.
That said, here are a few reasons to ride Amtrak:
- You get scenic views that you’d otherwise miss if you were flying or driving
- It’s often cheaper than flying (or even driving), as long as you know when to book
- You have more downtime to read, work, or chat it up with your seat buddy
- There’s no middle seat, so it’s only you and one more person sitting together (unless you’re seated in a business- or first-class fare, in which you’ll sit alone)
- You don’t have to show up to the station 2+ hours early, like you would at the airport
- You don’t have to go through security (which, depending on how you look at it, can both a pro and a con)
- It’s more environmentally friendly than flying or driving (a train journey produces on average 85% less CO2 than a flight and 87% less than a car trip)
- Riding Amtrak typically gets you a LOT closer to your destination unlike flying, where you have to take public transportation or drive there
I know right… that’s more pros than you expected!
Riding Amtrak is all about the experience. You know that saying, “It’s about the journey, not the destination?” Yeah, that applies to riding Amtrak. You’ll surely get to your destination, but you’ve got quite the adventure (for better or worse) before you get there.
I think this could be really helpful if you have some work to do. For instance, I worked the entire five hours on my recent trip back home from Chicago. One minute, we were still at Union Station — and the next, I saw the iconic Arch in St. Louis, signaling I was (almost) back home.
This was the perfect time to work because there really wasn’t much more to do, and I had to return to my day job the following day.
AMTRAK RIDE, FARE & ACCOMMODATION TYPES
All of the following information is pulled directly from the official Amtrak website. Feel free to visit the website for more information, including updates and changes.
RIDE TYPES
- Coach Class: enjoy wide, reclining seats with ample legroom, no middle seat option and at-seat trays, reading lights and electric outlets. Restrooms are located in each car.
- Business Class: a great option for both business and leisure travel. Includes extra legroom and a complimentary non-alcoholic beverage on many routes (features vary by train).
- First Class: available exclusively on Acela. Passengers enjoy priority boarding, premium amenities, complimentary onboard food and beverage services and privileged access to station lounges.
WHICH SHOULD YOU CHOOSE? Go with coach if your ride is relatively short and you don’t mind sitting next to someone. Go with first class if your ride is longer, you prefer to sit alone, and want complimentary food and drinks.
FARE TYPES
- Value Fares: A great option for those who are confident in their travel plans. Value fares are not changeable and 30% of the ticket value is forfeited upon cancellation before departure.
- Flex Fares: For those whose plans frequently change, even at the last minute. Flex fares are the perfect option, and are fully refundable and changeable without any fees.
- Sale Fares: Sale fares are an incredible deal and are available on a limited basis during active sales. Sale fares are not changeable and 50% of the ticket value is forfeited upon cancellation before departure.
WHICH SHOULD YOU CHOOSE? Go with a value fare if you want to save money and your travel plans are set in stone. Remember this fare is not changeable and you’ll only get 70% of your money back if you cancel your ticket before departure.
ACCOMMODATION TYPES
Not to be confused with class types, Amtrak offers several options for private rooms on their sleeper cars.
These are perfect for passengers who want a more private, luxury-esque riding experience — especially on longer routes like the famous California Zephyr or Empire Builder.
In all private rooms, a dedicated First Class attendant will provide turndown service, assist with meals and help with luggage.
Customers receive complimentary lounge access at major stations, priority boarding and complimentary meals onboard.
Options for private rooms include the following:
- Roomette: features two comfortable seats by day transformed to upper and lower beds by night. Each room includes a big picture window, newly upgraded bedding, pillows, towels and linens, and access to shared restroom and shower facilities.
- Bedroom: provides twice the space as a Roomette and feature a sofa and separate chair by day transformed into upper and lower beds by night. Each room includes a big picture window, newly upgraded bedding, pillows, towels and linens and a private in-room sink, restroom and shower.
- Accessible Bedroom: located on the entry level of the train and offer ample space for a wheelchair. Each room features seating by day transformed into upper and lower beds by night, plus a big picture window, newly upgraded bedding, pillows, towels and linens and an accessible in-room sink.
- Bedroom Suite: combines two adjoining Bedrooms, featuring two sofas and two separate chairs by day transformed into four beds by night. Each suite includes two big picture windows, newly upgraded bedding, pillows, towels and linens and two private in-room sinks, restrooms and showers.
- Family Room: spans the width of the car with ample space for two adults and two children (ages 2-12). Each room features seating for four by day transformed into two upper and two lower beds by night, plus two big picture windows, newly upgraded bedding, pillows, towels and linens.
WHICH SHOULD YOU CHOOSE? Go with a roomette if you’re a solo traveler. You’ll have just enough space without feeling crammed, and you’ll still have access to all of the perks from having a private room.
Amtrak BidUp
Amtrak BidUp is an opportunity to enhance your trip by submitting an upgrade offer or instantly purchase an upgrade to our premium classes of service: Business Class, Acela First Class and private Roomette and Bedroom accommodations.
If your bid is awarded, and your ticket is upgraded, your ticket(s) become fully non-refundable, non-changeable, and non-transferable even if purchased a flexible fare initially.
Click here to learn more about Amtrak BidUp.
POPULAR AMTRAK ROUTES
As the official Amtrak website says: Amtrak has over 30 train routes throughout the United States, and some in Canada. Amtrak travels to over 500 destinations in 46 states, giving you the best views North America has to offer.
Whether you want to visit big cities, small towns or places you can only see by rail, Amtrak can take you there!
Below are the most popular Amtrak routes. You’ll probably recognize them if you’ve done even a tiny bit of research, or have watched train travel videos on YouTube.
Know that the stations listed are the most notable ones. Between these, you’ll stop at smaller stations, which will typically be shorter.
- Acela: Boston, MA → New Haven, CT → New York , NY → Philadelphia, PA → Wilmington, NC → Washington, D.C.
- Amtrak Cascades: Vancouver, BC → Seattle, WA → Tacoma, WA → Portland, OR → Salem, MA → Eugene, OR
- Amtrak Mardi Gras Service: New Orleans, LA → Gulfport, MS → Mobile, AL
- California Zephyr: Chicago, IL → Omaha, NE → Denver, CO → Salt Lake City, UT → Emeryville / San Francisco, CA
- Cardinal: New York, NY → Washington, D.C. → Charlottesville, VA → Cincinnati, OH → Indianapolis, IN → Chicago, IL
- Coast Starlight: Seattle, WA → Tacoma, WA → Portland, OR → Sacramento, CA → San Francisco area (CA) → Los Angeles, CA
- Crescent: New York, NY → Washington, D.C. → Charlottesville, VA → Charlotte, NC → Atlanta, GA → Birmingham, AL → New Orleans, LA
- Empire Builder: Chicago, IL → Milwaukee, WI → St. Paul / Minneapolis, MN → Minot, ND → Spokane, WA → Portland, OR / Seattle, WA
- Southwest Chief: Chicago, IL → Kansas City, MO → La Junta, CO → Albuquerque, NM → Flagstaff, AZ → Los Angeles, CA
- Texas Eagle: Chicago, IL → St. Louis, MO → Little Rock, AR → Dallas, TX → San Antonio, TX → Tuscon, AZ → Los Angeles, CA
Whew, even typing all this has me exhausted (and simultaneously eager to get my butt on one of these trains)! So far, I’ve traveled between St. Louis + Chicago (five times) and Washington DC + Boston (one time) on Amtrak.
Tangent aside… have you noticed something?
Nearly all of the routes above include Chicago, IL. Its central location in the US makes it the perfect Amtrak hub. Another notable destination is Los Angeles. It’s the most popular on the West Coast.
If you live in or near these destinations, you’ve got tons of opportunities to utilize Amtrak. We’ll discuss this in the next section.
Like I said, these are just some of the many routes Amtrak has to offer. Visit Amtrak’s official website to check out the rest of them.
POPULAR AMTRAK STATIONS
Just like airlines, Amtrak also has several popular stations throughout the US. Think of these as prominent stations and areas that contain some of Amtrak’s most popular routes.
Here are five of Amtrak’s most popular stations based on annual ridership. I got this information from the 2025 Amtrak fiscal year report.
- New York Penn Station
- Location: New York City, NY
- Ridership: 13+ million riders per year
- Washington Union Station
- Location: Washinton, D.C.
- Ridership: 6+ million riders per year
- 30th Street Station
- Location: Philadelphia, PA
- Ridership: 5.6+ million riders per year
- Chicago Union Station
- Location: Chicago IL
- Ridership: 3+ million riders per year
- South Station
- Location: Boston, MA
- Ridership: 1.9+ million riders per year
- Other popular stations include Baltimore Penn Station, Los Angeles Union Station, and Boston’s Back Bay Station.
As I’m putting this information together, I’m noticing a distinct pattern. Amtrak mainly serves the East Coast (New York, Massachusetts, Washington DC, Connecticut + Pennsylvania).
If you live in or near this region, I highly encourage you to take advantage of what people often refer to as “East Coast Privilege.”
WHAT IS AMTRAK’S BAGGAGE POLICY?
Amtrak allows one personal item (up to 25 pounds) and two carry-on items (up to 50 pounds each).
Overweight baggage is strictly prohibited. If your bag is overweight, you must repack it so it fits the weight allowance.
Personal items include tote bags, purses, backpacks, laptop bags, and more. Carry-on items include a large duffel or a carry-on suitcase.
You must be able to safely lift carry-on items over your head onto the luggage shelf.
You can also check a bag if you’d like. Travelers are allowed up to four checked bags. The first two are free and the other two cost $20 each.
Simply head to baggage drop-off area to drop off your luggage at your origin station. Once you arrive at your destination, head to the baggage claim area to pick up your luggage.
NOTE: I find that Amtrak isn’t terribly strict with their personal item policy, unlike airlines. People often bring other items on the train with them, including shopping bags. I’d still suggest that you stick to one item to avoid any trouble with train attendants.
OTHER THINGS TO KNOW ABOUT AMTRAK
I wanted to share a few more important things to know about Amtrak. I’ve learned these from first-hand experience, as well as through research online.
- When riding Amtrak, you’re subject to freight delays since you share the railroads — and yes, the freight trains always get the right of way.
- You typically won’t know your boarding area or exact train until about 15-30 minutes before departure (which is really annoying for us anxious travelers, if I had to be honest).
- You’ll still want to show up to the train station somewhat early, despite not having to go through security — especially for your first time. I typically try to arrive about an hour before departure.
- You won’t have your ticket scanned until everyone has boarded and the train departs the station. So keep it out and ready for the conductor to scan!
- Unlike a flight, you don’t have to check in for your train ride. Simply show up to the station and wait to board!
- Be sure to sign up for text message updates. This will keep you in the know about delays, boarding, schedule changes, departure announcements and more.
- If riding coach, you won’t be assigned a seat. It’s kind of like Southwest Airlines’ old seating policy, but less structured. With this in mind, you’ll want to board the train ASAP for a good seat.
- Wi-Fi is spotty and unreliable for most of your trip. Be sure to download media and bring other things to keep you entertained during your trip.
- There is a cafe car where you can buy snacks, beverages (both alcoholic and non-alcoholic), and hot meals. Menus vary depending on your route. The national cafe menu’s prices range from $2.25 to $12.25.
- Access to the dining car is limited for coach passengers, while sleeping car passengers are prioritized for lunch and dinner service. Breakfast is often more flexible.
- While most seats have outlets, I wouldn’t bet on it. Bring a portable charger to be on the safe side.
- You can absolutely bring your own food and drinks on the train. I actually suggest doing this to save money and stick to any dietary restrictions you may have.
- Try to book as far out as possible. The sooner you buy your train ticket, the cheaper it will be. You can make reservations up to 11 months in advance of travel.
- You’ll make stops along the way to pick up and drop off passengers. Most stops will be fairly short, only around five minutes. Stops at bigger stations like New York or Washington DC will typically be longer, as you’ll have more passengers boarding and disembarking the train.
- Consider getting a ride pass if you plan on traveling via Amtrak often. These passes include a multi-ride pass (with monthly, 10-ride and 6-ride options), a USA rail pass, and a California rail pass. Visit the official Amtrak website for more information on these passes.
- Try to book a ride where your station is the origin station if you want the best opportunity to find an empty seat. The further into the ride you’re in, the less seats will be available. For example, there will be more seats if you board at New York’s Penn Station than if you board at Charlottesville’s Union Station on the Amtrak Cardinal route between NYC and Chicago.
- If you get on a train without a ticket, you will be asked to purchase one on-site (which will typically be much more expensive than if you bought it in advance) or exit at the nearest station.
- Sit in the window seat if you don’t want to miss the scenic views and don’t think you’ll need to use the restroom too much during your trip. Sit in the aisle seat if you don’t care for the views and/or plan to use the restroom often. I personally prefer sitting in the window seat not only on the train, but also on the plane and buses.
- Bring a blanket and/or layered clothing! The train can get incredibly cold, and you don’t want to be shivering the entire ride.
MY FAVORITE TRAIN TRAVEL CREATORS
You see so many travel creators who travel by plane, but not as many who travel by train.
I think train travel is a special way to travel, and I hope people become more open to it. Yes, I know it takes longer (and sometimes even costs more), but like I said earlier, it’s all about the journey.
Not to be cheesy or anything!
Below are some of my absolute favorite train travel creators. Every now and then, I’ll binge their content and it’ll get me all excited to ride Amtrak:
GET ACCESS TO 11+ TRAVEL FREEBIES & RESOURCES
Join the TSS Freebie Library and unlock a growing collection of quizzes, templates, cheatsheets, printables, maps, and helpful resources to up your travel game. Get access by completing the form below.
By doing this, you will also be added to my weekly travel newsletter for even more travel advice!
FINAL THOUGHTS + NEXT STEPS: HOW TO RIDE AMTRAK
In this post, I gave you a full rundown on how to ride Amtrak. I think riding Amtrak can be a nice alternative to flying or driving, so I hope this guide taught you everything you need to know before your first train ride.
The journey doesn’t end here, though. If you still need help planning your trip, check out these guides I wrote:
- My Favorite Travel Essentials That I Bring on Every Trip
- The Ultimate Travel Packing List for Any Trip
- How to Use Packing Cubes the Right Way (in Just 4 Easy Steps)
PLANNING A TRIP SOON? THESE ARE MY FAVORITE RESOURCES!
If you’re planning a trip soon, I suggest using some of my favorite travel resources. I use these for every trip and I couldn’t live without them!
- FLIGHTS: I use Google Flights and Skyscanner to find flight deals. I also use Hopper to decide the best time to book flights. All three services have flight alerts that can be sent directly to your email.
- ACCOMMODATION: I use Hotels.com and Airbnb to find accommodations, but I prefer hotels since they’re a safer and more responsible choice. I also use Kayak to find hotel deals and decide the best time to book a room.
- PACKING: I always use my Solo Travel Packing List in the TSS Freebie Library. It has everything you could ever need for almost any kind of trip and ensures you never forget anything!
- ACTIVITIES & TOURS: I use GetYourGuide and Viator to book special experiences like walking tours and guided museum tours. I also use CityPASS and GoCity passes for bundled activities, as they’re often cheaper than booking things individually.
- TRAVEL INSURANCE: I typically use either IMG Travel Insurance or World Nomads Insurance, depending on which is a better deal. If my travel plans aren’t final, I’ll get CFAR insurance, which will give me up to 75% back on nonrefundable trip expenses like airfare and accommodations.
- TRAVEL CREDIT CARD: I use the US Bank Altitude Connect for all of my travel expenses, including hotels, ride-hailing services, activities and dining. I’ve also used the Chase Sapphire Preferred, which is excellent for beginners. Both offer travel insurance!
Want more travel resources? Check out this post for 50+ of my favorite travel planning apps and resources.
ABOUT DEMARCUS
DeMarcus is a Midwest-based travel content creator and the founder of the solo travel blog, The Solo Solstice. He began his solo travel journey in December 2025 and since has been creating practical, in-depth travel guides for a like-minded community of first-time solo adventurers.
Visit the About Page to learn more about DeMarcus, and visit the Ethical & Responsible Tourism Page to learn more about his efforts to promote responsible tourism.